General Tips
Crease your binding material before binding to make alignment easier. Folding in half and rubbing across the edge of a table is a super easy and quick way to get a good crease.
Choice of binding materialcan affect the binding quality. I use basic grosgrain ribbon for a lot of my binding where the shapes are mostly straight edges, but for curves a dedicated binding tape with a little bit of stretch gives a much nicer finish, with no ugly puckers and creases
Binder attachments for your sewing machine help a lot with making an even crease in your binding material, and keeping the stitch line evenly distanced from the edge raw.
For domestic machines the binding attachment is usually a type of presser foot, which can be quickly clipped or screwed on.
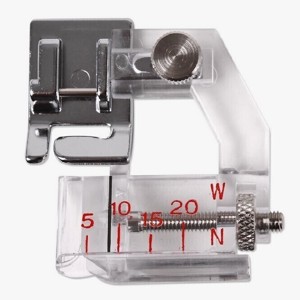
For industrials it can be an attachment that screws onto the bed of the machine, or a complete replacement for the feed dogs, presser feet and needle plate. Sometimes these can be attached to domestic machines if your machine base has the two holes for screwing them in.

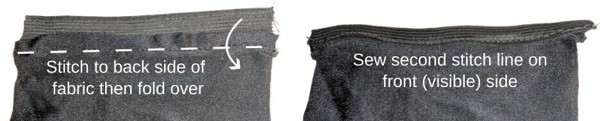
Attachments aren’t essential though! With care you can get a good finish just folding by hand and careful stitching. Narrow basting tape (a type of thin double sided sticky tape) or an initial line of stitching can be used to attach the binding material first before folding in half to do a second stitch through all the layers.

Folding the binding tape in half by hand.
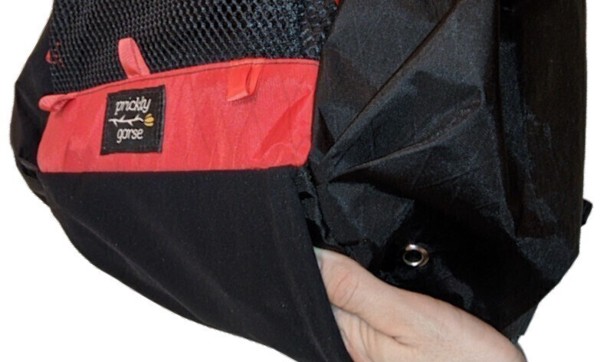
Elastic Binding.
Essential for stretchy topped pockets, sleeve cuffs, and similar features.
If you can find it, dedicated centre-fold elastic makes the process a lot easier. This elastic has a pre-made crease in the centre so it will always have an even fold and finish.
To sew the elastic to your fabric, ideally you want to use a zig zag stitch (on most domestic machines) or a stretch stitch (check your manual), even if this means swapping back to a domestic zig-zag capable machine if you primarily use a industrial straight stitch machine. You can however use a straight stitch if you stretch the elastic (and fabric if required) slightly while sewing, so the thread has some slack in the finished seam line.
When sewing elastic to non-stretch fabrics, you need to fully stretch the elastic to the length of the non-stretch fabric while sewing. This will gather the fabric when you relax the elastic. Lots of pins/clips help, as does a binding attachment, and your machine’s presser foot can act kind of like a third hand stretching the elastic. Take care to keep the elastic stretch even throughout the seam.
Elastic binding a stretch fabric is much easier as you can cut the elastic to the same length as the fabric and just zig zag without stretching. If you are using a straight stitch only machine however, you need to stretch out both the elastic and the fabric while sewing.
You can avoid the elastic binding all together with stretch fabrics if you double roll over the edge forming a rolled hem, then stitch. It can be quite difficult to get the hem looking even though compared to when using elastic binding, and the elastic has an advantage of forming a sort of ‘lip’ that helps keep contents inside the pocket. I like to fold the elastic behind itself twice so it is rolled up into the stretch fabric, to hide the elastic and form a wider ‘lip’
As with sewing normal binding tape described above, you can sew elastic binding in two steps to help make a cleaner finish. Just remember to stretch the fabric and elastic as required when doing both lines of stitching.