Following patterns is a great way to make your own gear, but designing your own from scratch is even better. If you’ve never designed anything yourself, this guide should help give you a starting point towards understanding the geometries and seam allowances.
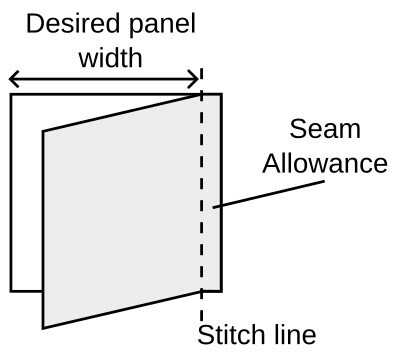
Fundamental Concept: Seam Allowances
If you have two pieces of fabric that are your bag’s panel dimensions, you can’t just join them together like you would with paper and tape. You need to add a narrow bit of extra fabric that you can sew along to hold the sewing thread.
This is the seam allowance. Generally you keep it consistent throughout a project, for example 3/8 inch (10mm) or 1/2 inch (13mm). In CAD software it is called adding an offset.
The Starting Shape: Cube/Bucket Shaped Bag
This is probably conceptually the easiest shape to start with for understanding how to build bag patterns. This is the building block for roll top bags, tote bags, and many other shapes.
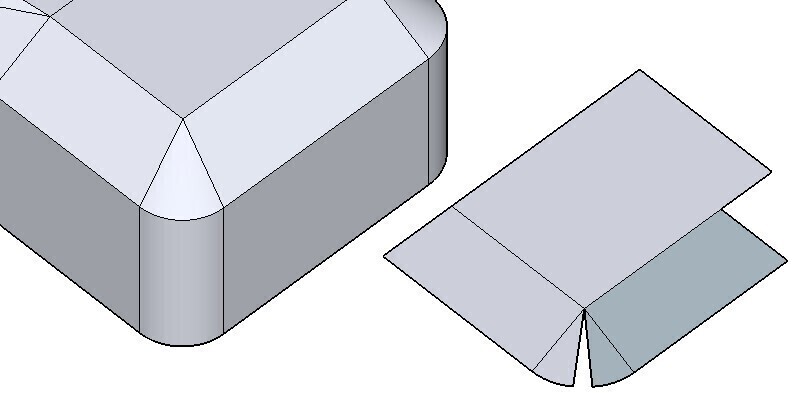
An open top cuboid is simply 5 faces when laid out in plan view. To turn this into a pattern, all that is needed is to add seam allowances to each face.
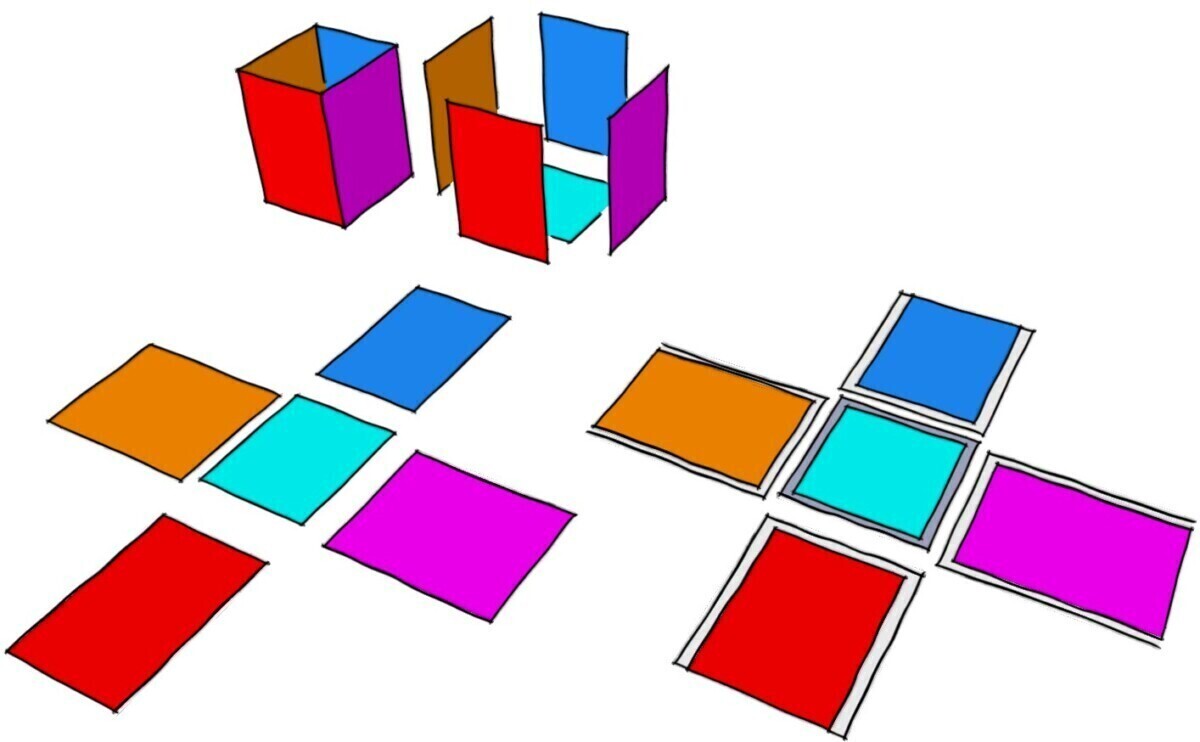
To sew these 5 pieces, you would sew along the seam line, stopping before the edge of the fabric at each corner (you don’t sew into the seam allowance at the edges). The extra seam allowance at the opening could be folded back on itself and sewn flat to hide the raw edges.
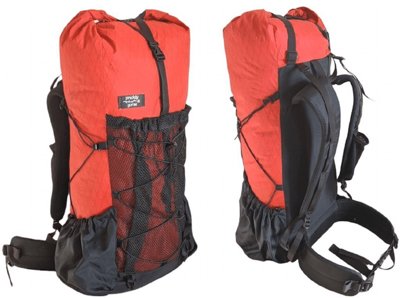
These 5 panels could for example make a backpack, with a front panel, a stronger fabric base and back panel, and different coloured sides.
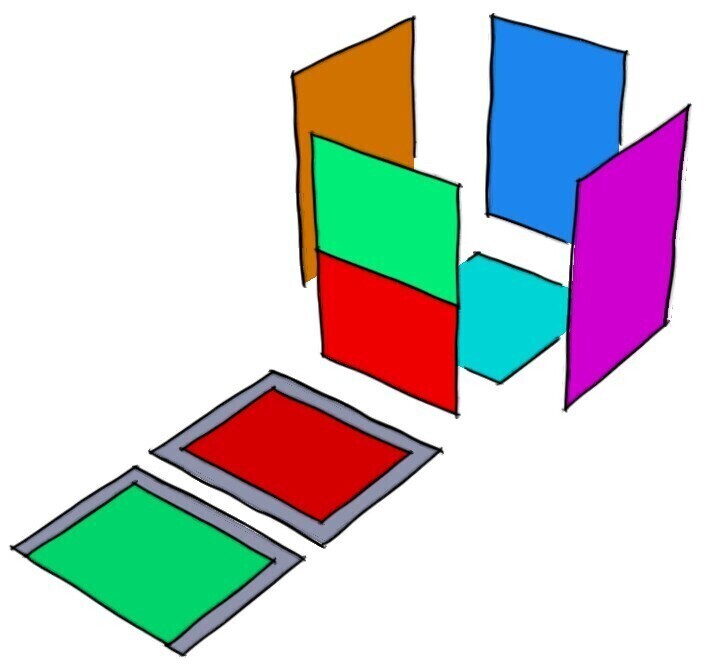
If you wanted to split one of the panels, for example to add a strap or a pocket, you simply need to split and add seam allowances to both panels.
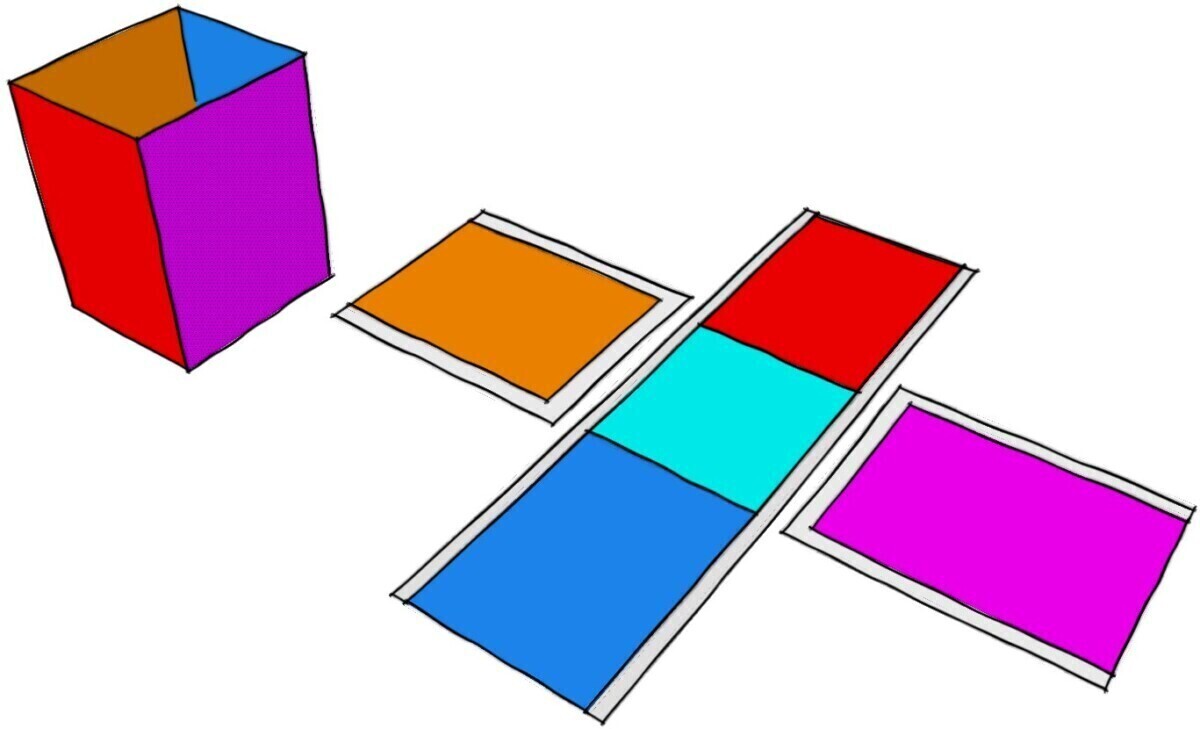
But you don’t have to have 5 panels. If you wanted a continuous gusset and two sides instead, you can think of your cuboid like this, and then lay it out, and add seam allowances to make your pattern.
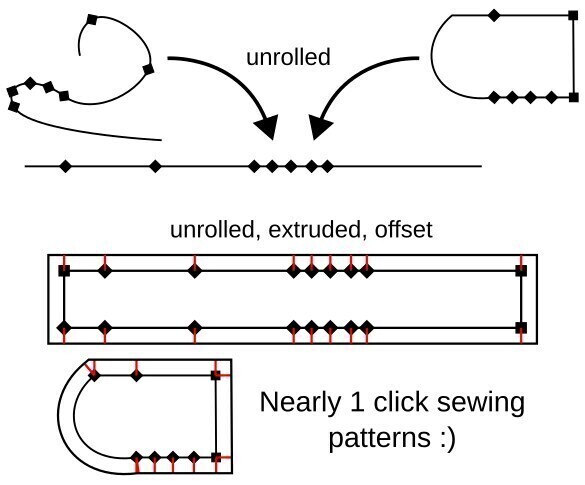
Those sharp corners on the continuous strip aren’t too nice to sew, neither are they aesthetically pleasing, so lets try rounding them off.
Curves are intimidating for beginners, but lets make it as simple as possible, and just use quarter circles.
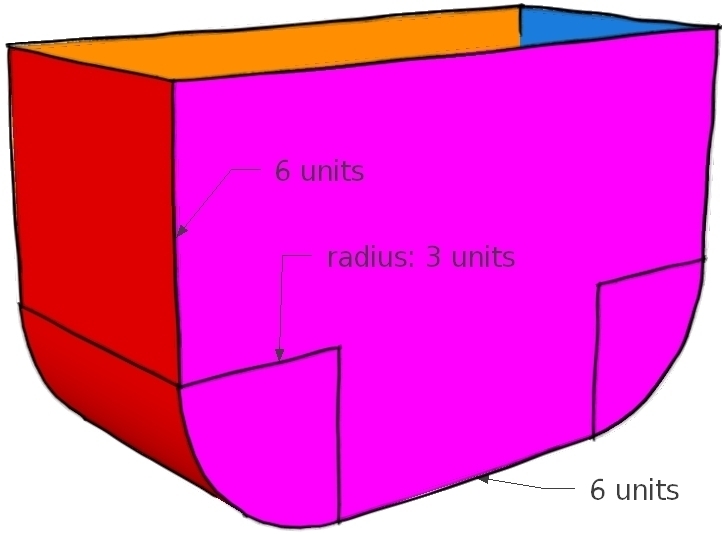
To calculate the curved bits length, you can simply use the formula for a circumference of a circle C=2πr, divide by 4 since we’re using quarter circles, and you’ll have the length of your curved corner.
Now if you divide your side panel into pieces and add them together, you’ll get the new panel length.
In this example, lets assume the curve has a radius of 3, the top sides above the curve are 6, and the bottom between the curves is also 6.
The length of the middle strip (before seam allowances) is:

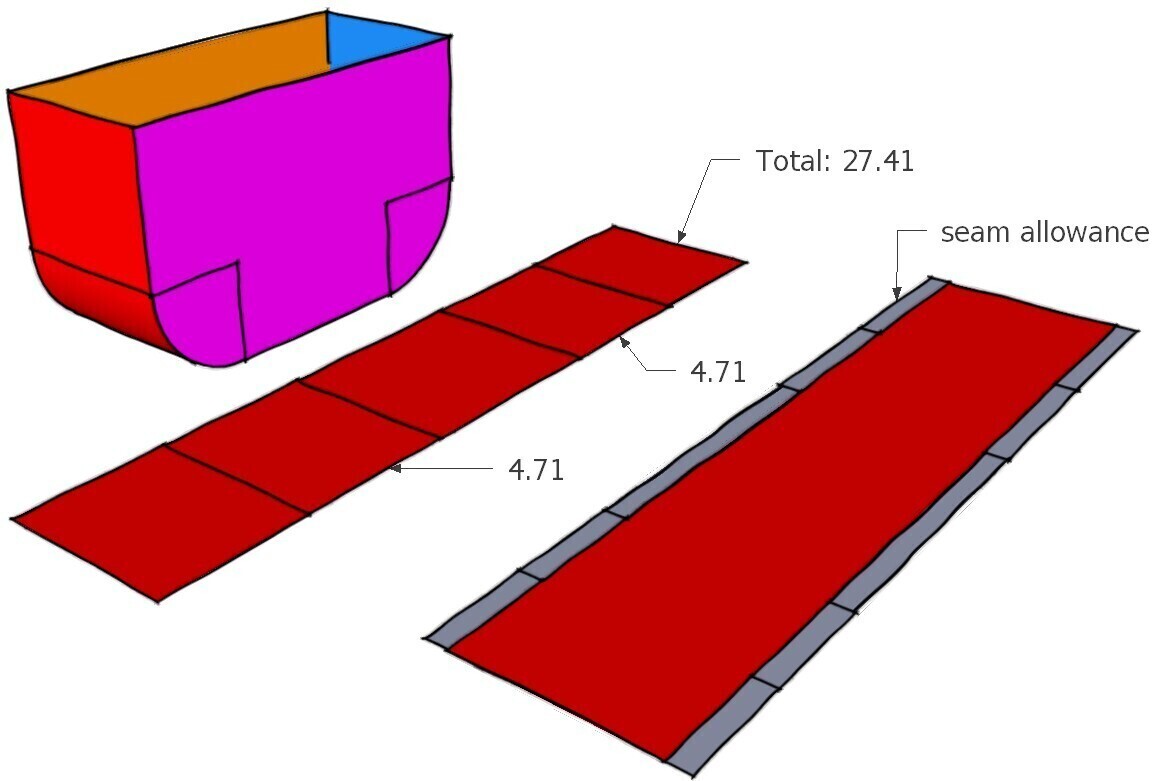
Add your seam allowances to the new side panels and gusset piece, and you have your pattern. Adding alignment marks at the edges of the curves on both the side panels and gusset is highly recommended.
If the Side Lengths are Equal, It Will Sew*
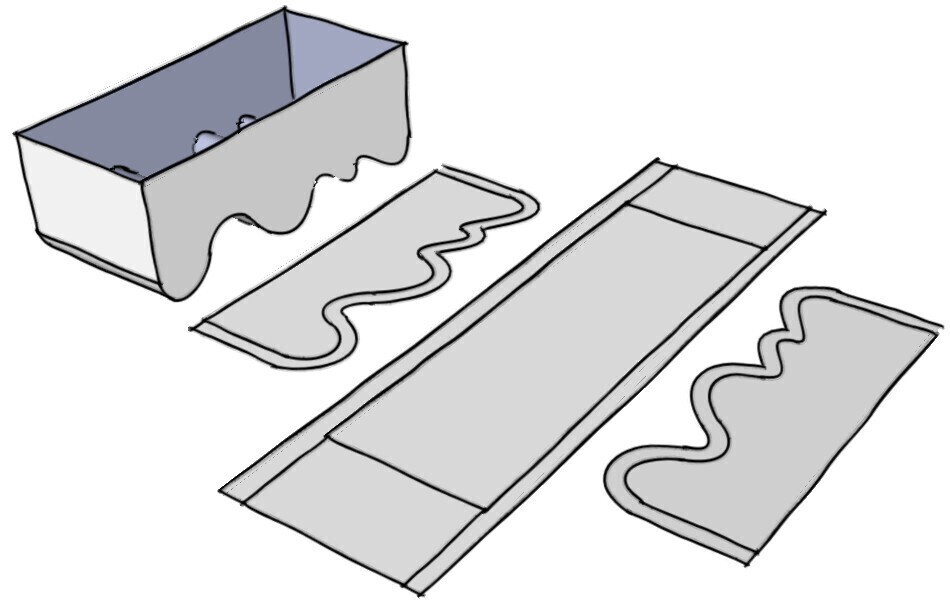
Curves scared me when I started out, and I avoid them for ages until I realised this point. You can make all sorts of curved shapes, not just semi circles, as long as you remember that the lengths of the other panels are the same to match. Seems obvious, but get that concept and you can create any sort of weird shapes
*The caveat is that sewability needs to be considered. Inside curves tend to be a bit trickier to sew and prone to puckering on the finished bag due to how the seam allowance folds on itself. Some seams just don’t join very well. With practice you’ll learn what is sensible
Without a computer, accurately measuring curves can be a bit tricker. You could line string along it and measure the string, use a measuring wheel, roll the pattern along a ruler if it is a stiff pattern etc.
Zips
I’ve already written an article about the different types of zips themselves , and they’re not too difficult to pattern around.
The key thing to understand is what happens when you sew a zipper
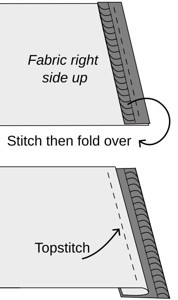
They are normally sewn with two lines of stitching. An initial line to hold the zipper in place, then a top stitch after folding the fabric to hold the zipper seam flat and add extra strength.
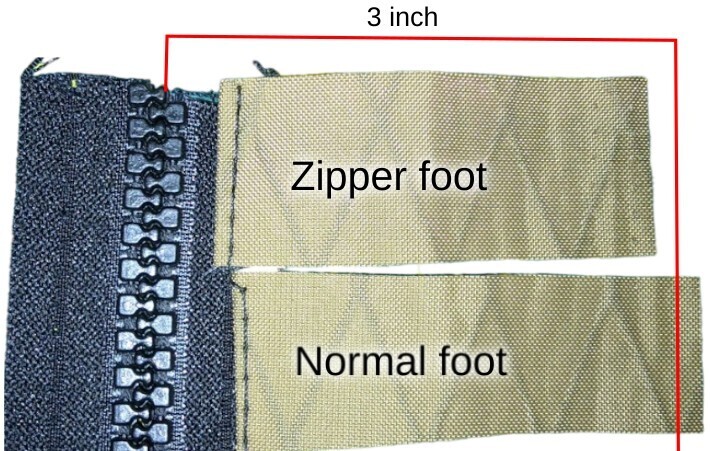
When you fold back the zipper tape, you might find the panel has become a little bit shorter or longer, based on how close you have sewn to the zipper teeth themselves.
There are a couple of ways to pattern around this. The easiest way is just to split your fabric panel, and sew exactly in the middle of the half of the zipper tape you are working on. With a normal #5 zip, this typically means a 8mm (5/16 inch) seam allowance, which is the 32mm wide zip divided by 4. When you do this, your panel should remain the exact same width, and requires no more patterning effort than just dividing the panel into two. This is an uncommon seam allowance though, and might not be marked on your needle plate.
The alternative is adding or removing fabric from the pattern based on the seam allowance you can achieve with your machine, worked out from testing with some scrap. As shown above, if I use my zipper foot and sew as close as it allows to the teeth, I need to add around 5mm to each panel half. My normal foot doesnt get nearly as close to the teeth, so I need to remove about 3mm from each panel half.
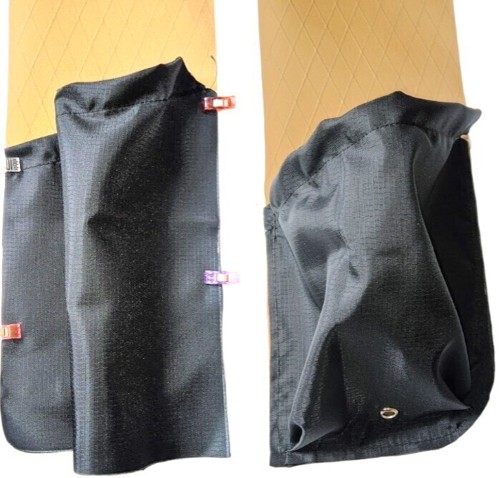
Pleats
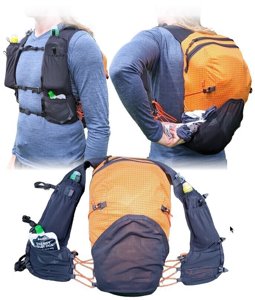
A way of adding extra volume to a piece, such as a pocket. It allows a wider piece to be sewn to a smaller piece, with the slack giving volume.
This is a simple example of making a backpack pocket. The slack fabric is folded at the base to reduce the width to the same as the side panel, and then sewn flat. I have folded the pocket a couple of times nearer the left and right edges instead of one single fold, as this puffs back out better.
Darts
Darts have a similar purpose to pleats in that they take up excess fabric and use it to give volume to a piece. The difference is darts are ‘permanent’ as they are sewn into a shape, while a pleat is free to open or collapse. In the photo below, the front panel is longer than the bag width, and the excess is taken up by sewing the diagonal corners to make it the same dimensions as the panel below. I’m not going to go into more detail in this article as I’ve already written up an entire guide to patterning darts here.
Software
Its easy to experiment with paper, but you can also ‘cheat’ and use software if you are inclined that way. Some people disagree with using software, but I’m of the opinion that you should use whatever tools make your life easier. For some it is pen and paper, for some it is software.
Software can’t completely replace practice and knowledge, because for example, it can’t know what is a sensible seam placement.
I personally use Sketchup+unwrap plugin and/or Blender with UV unwrap+papercraft plugin. This will be the topic of a future article.
I have also made an open source inkscape extension that can automatically generate pattern sections from curved pieces, that is immensely useful for bag pattern making.
Have fun!
This is just intended as a quick starter post if you have absolutely no idea where to start from. Experiment, play with designs, prototype, take old broken gear apart and see how it was made!