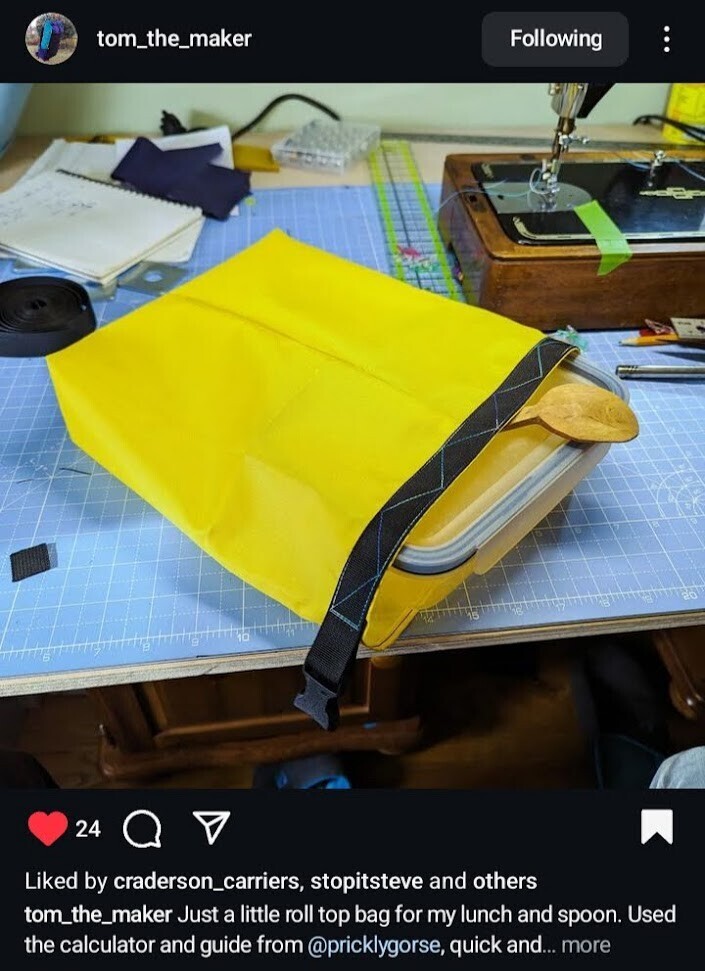
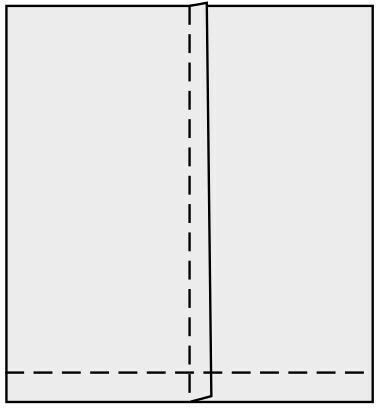
A simple calculator and instructions for a great beginner MYOG sewing project. This is a variation of the zip pouch calculator, as roll top bags with square bottoms are far easier to seam tape than a rounded bottom bag.
The calculator assumes using 25mm/1 inch webbing for the roll top webbing

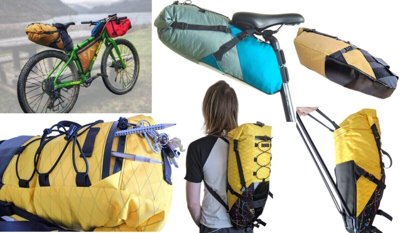
Fabric width:
Fabric height:
Webbing Length:
Optional Seam Tape Length (1 inch, 25mm wide):
Litres:
Fun fact: this is a minimum volume estimate that doesn't account for bulging. Big manufacturers fill bags with small beans or balls of known volume to accurately measure volume.Recommended seam allowances for your chosen measurement unit:
| Inches | Centimeters |
|---|---|
| 0.25 (1/4) | |
| 0.375 (3/8) | 1 |
| 0.5 (1/2) |
Sewing Instructions
These instructions use basic seams so there is minimal bulkyness if you want to seam tape the bag to make a dry sack. As well as providing waterproofing, the tape protects the raw edges of the fabric.
Otherwise, if you are not taping and are using a fabric that frays easily, you could bind the seams with grosgrain, or sew a zig zag stitch that captures the raw edges, or fold the seam allowances in on themselves and sew flat.
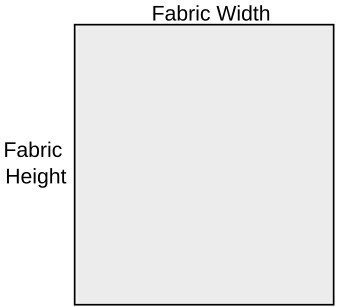
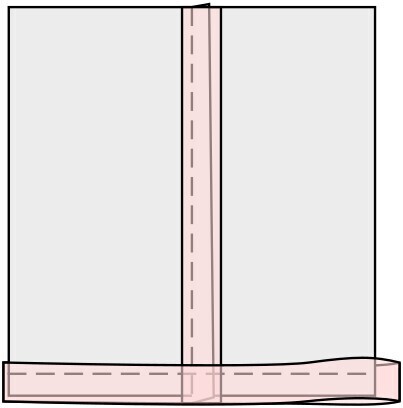
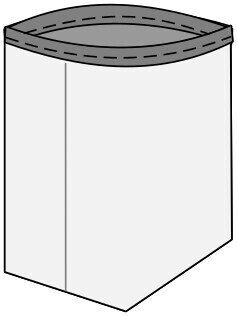
Fold the fabric in half, right sides touching, and sew along the height of the bag with your chosen seam allowance.
If you want to seam tape the bag to make a dry bag, trim the seam allowance down to around 3/8 inch (1cm) if you've used something wider, otherwise leave it as is.
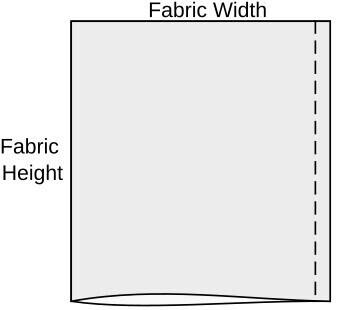
Wriggle the fabric so the seam line is in the centre
Sew another seam along the bottom edge.
If you want to seam tape the bag to make a dry bag, trim the bottom seam allowance down to around 3/8 inch (1cm) if you've used anything wider.
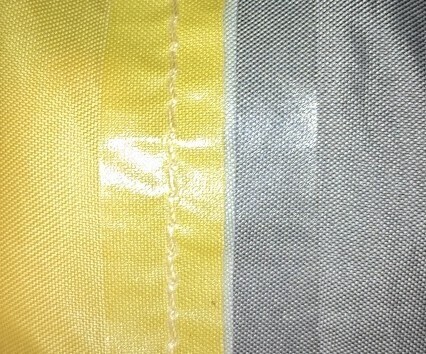
Lay a vertical strip of seam tape that covers both the thread and the entire seam allowance width, and use a hot iron to press down. Seam tape is usually 3/4 to 1 inch wide (20 to 25mm), so trimming the seam allowance previously means the tape can completely cover and overlap the seam allowance. This gives plenty of tape either side to adhere to the fabric, for maximum water resistance.
Along the base, I find ironing on a overlapping loop of seam tape that completely covers the seam allowance and thread to be the most reliable waterproofing.
Note that waterproofing at home is very difficult to get right. Factory made gear has machines specifically for this one task.
Also consider using liquid sealants, which you can paint into the seams. This page has more info on seam sealing
Using a marker that wont bleed through the fabric onto the right side, such as a pencil, mark out two boxes that have side lengths that are **half your chosen bag depth**, on both sides of the fabric.
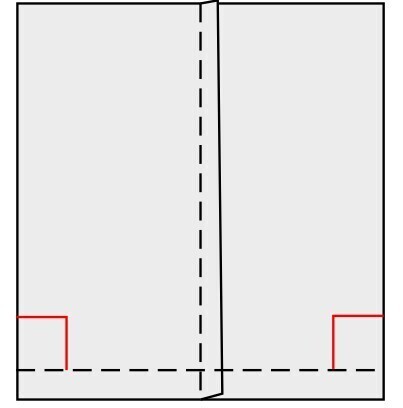
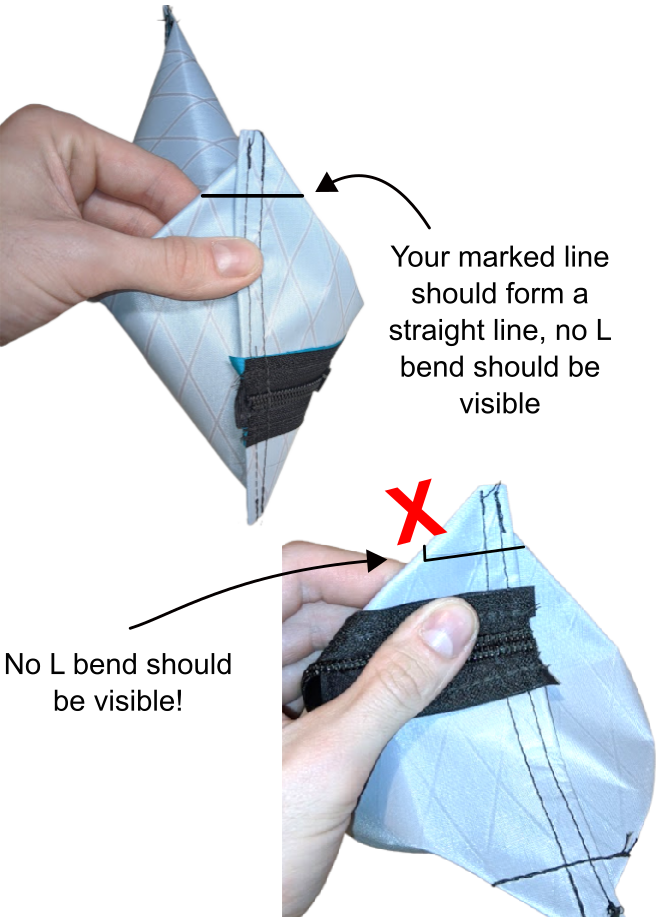
Pull and pinch the bag into a 3D shape, forming triangles in the bottom two corners, using the lines you just marked out to guide the shaping of the bag.
If you are making a large bag, you can snip off some of the excess triangle fabric, making sure to leave around 1/2 inch (12.5mm) seam allowance
If you are seam taping, snip the excess triangle off, leaving instead around 1/4 to 3/8 inch (6 to 10mm) seam allowance. Seam tape as in the previous step, by overlapping a loop of seam tape that completely covers the stitching and seam allowance.
Invert the bag the correct way around
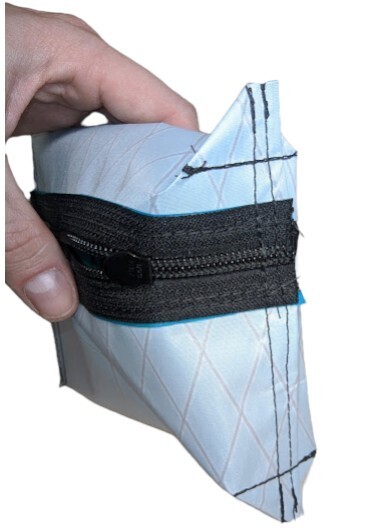
Either bind the top edge with grosgrain ribbon or similar, or fold the top edge inwards (wrong sides touching) by 1/4 inch (6mm) twice to form a rolled hem and sew flat.
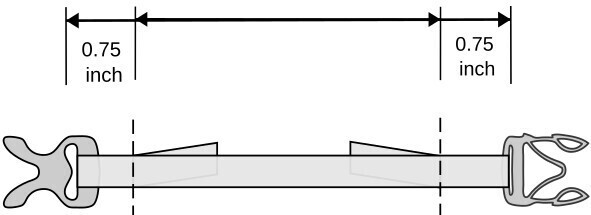
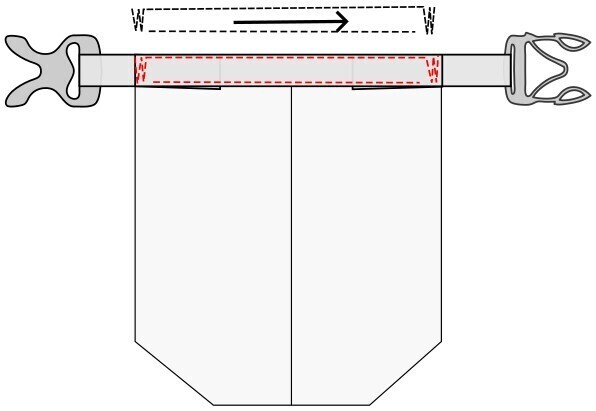
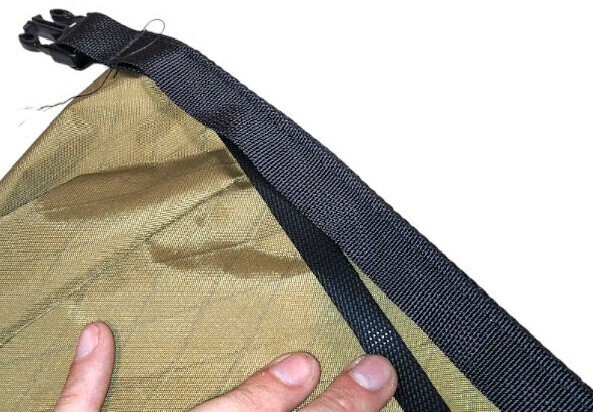
Thread your webbing through both halves of your side release buckle
Sew two stitches apart, while keeping the buckles around 0.75 inch away from these stitches.
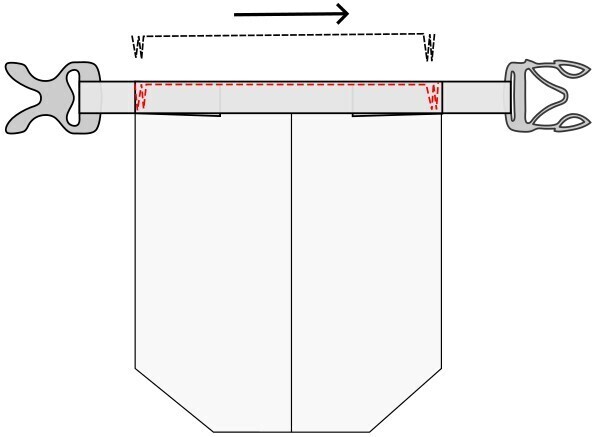
Pull the fabric of your bag taught, so the vertical centre seam is aligned on the middle of the top edge
Place the webbing and buckles on top, so the stitches on the webbing align with the edges of the bag
Starting at the left side (making sure not to sew the bag closed. It is easily done!), sew up and down twice, then rotate the bag 90 degrees to sew along the top edge. At the right edge, turn the bag counter clockwise 90 degrees and sew up and down twice.
Now starting again from the left, sew along the bottom edge of the webbing, making sure not to sew the bag closed. It is easily done!
I do this in two steps so I dont have to move the entire bag around inside the sewing machine's throat. It's not a big deal with dry bags and thin lightweight fabrics, but is a huge struggle when making backpacks.
You can slide a narrow bit of plastic under the webbing while doing this step to act as a roll top stiffener. A long cable tie works well.
Finished! Take your bag on an adventure!